

Quick Summary
Clothing repair means fixing damaged garments so they can be worn again, using simple hand stitches like backstitch and darning with a basic kit. It cuts textile waste, saves money on replacements, and keeps favorite pieces in use longer.
- Check the fabric type and damage before choosing a repair method.
- A basic kit of needles, cotton and polyester thread, scissors and pins covers most repairs.
- Use backstitch for stress areas like armholes, crotches and pocket corners.
- Test the repair by gently stretching it before wearing the garment again.
- Wash repaired garments inside out on a gentle cycle and skip the dryer at first.
Table of Contents
- Why Clothing Repair Supports Sustainable Living
- Assessing Damage Before You Choose a Repair
- Basic Clothing Repair Tools to Keep at Home
- How to Mend Clothes by Hand, Step by Step
- Clothing Repair Without a Sewing Machine
- Visible Mending for Beginners
- Start Your First Repair This Week
- Frequently Asked Questions
DIY Clothing Repair Tips for Sustainable Living
Last Updated: November 17, 2026
Why Clothing Repair Supports Sustainable Living
Clothing repair is one of the simplest ways to cut waste. Fixing a torn seam or a missing button keeps a garment in use and out of the trash.
A study of U.S. participants found that Extending the Lifetime of Clothing through Repair and Repurpose, 2022 55% had repaired or repurposed clothing. That is a strong starting point, and most of those people were probably doing small fixes.
Clothing repair means fixing damaged garments so they can be worn again. It includes sewing buttons, closing small holes, and reinforcing worn areas.
Repair does more than save money. Each garment you keep in use is one less item heading to a landfill. It also means fewer new clothes need to be made and shipped.
Here is what repair typically helps with:
- Extending the life of favorite pieces
- Reducing textile waste
- Saving money on replacements
- Making a faith-inspired wardrobe last longer
Still, most people only do the easy fixes. Researchers at Sheffield Hallam University found that What prevents people repairing clothes?, Sheffield Hallam University Research Archive beyond sewing on buttons or stitching hems, repair was not a normal household habit. The good news is that basic skills go a long way.
Assessing Damage Before You Choose a Repair
Before you pick up a needle, look closely at the damage. The type of damage decides which repair will hold up.
Ask yourself a few quick questions:
- Is the fabric knit or woven?
- Is the damage a small hole, a tear, or a loose seam?
- Is the garment worth the time it takes to fix?
Knit fabric stretches, so it needs a different approach than woven cotton. A patch that works on denim may pucker on a jersey tee.
Watch out: Don't pull on a tear to see how big it is. Stretching the fabric can turn a small hole into a large one.
Use this quick checklist to decide:
- Small hole: patch or darn
- Loose seam: hand-stitch or machine-stitch
- Missing button: sew on a replacement
- Worn hem: re-stitch by hand
- Large tear in a heavy-wear item: consider a reinforced patch
Basic Clothing Repair Tools to Keep at Home
You don't need a full sewing studio. A small kit covers most repairs. Keep these items together in a box or basket so you can grab them quickly.
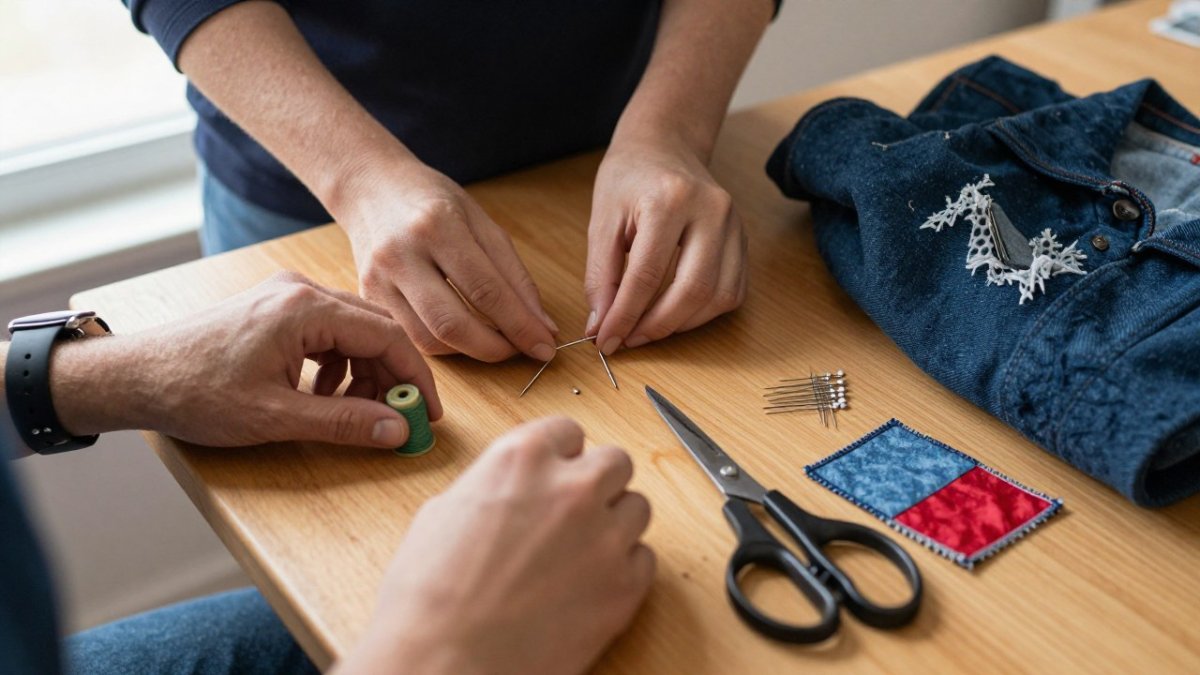
| Tool | What It Does | Best For |
|---|---|---|
| Hand-sewing needles | Pull thread through fabric | Seams, hems, buttons |
| Thread (cotton and polyester) | Holds repairs together | Most fabrics |
| Fabric scissors | Trim threads and patches | Clean cuts |
| Pins | Hold patches in place | Lining up repairs |
| Darning egg or mushroom | Supports fabric while darning | Socks and knitwear |
| Iron-on patches | Quick reinforcement | Holes and worn spots |
You can add a seam ripper and a measuring tape later. Start with the basics.
How to Mend Clothes by Hand, Step by Step
Hand mending is the most useful skill you can learn. It needs only a needle, thread and a little patience. The key is matching the stitch to the fabric and the damage, then testing the repair before you wear the garment again.
Match the stitch to the fabric and damage
Use this decision guide before you thread a needle:
| Fabric type | Damage | Best hand stitch | Why it works |
|---|---|---|---|
| Denim, canvas, heavy cotton | Small hole or worn spot | Backstitch or running stitch with a patch behind | Strong seam that resists pulling |
| Jersey, knits, sweaters | Small hole | Darning or duplicate stitch | Follows the stretch of the knit |
| Woven cotton, linen, blends | Loose seam | Backstitch | Holds stress at armholes and crotches |
| Socks, thin knits | Hole at heel or toe | Darning with a darning egg | Keeps the repair flat and even |
| Any fabric | Missing button | Shank button stitch | Leaves room for the button to move |
Step-by-step for a simple seam or small hole
- Thread the needle. Use a length about the distance from your fingertips to your elbow. Longer thread tangles; shorter thread runs out too soon.
- Knot the end. Wrap the thread around your finger and roll it off to make a knot.
- Start inside the garment. Hide the knot on the wrong side of the fabric so it does not rub against skin.
- Stitch over the damage. Use small, even stitches about 1/8 inch apart. For stress areas like armholes, use a backstitch: bring the needle up through the fabric, then back down behind the previous stitch.
- Finish with a knot. Make two or three small stitches in the same spot, then cut the thread.
Expected result: A neat seam that holds up to normal wear.
For small holes in knits, a simple darn works well. Weave thread back and forth across the hole, going over and under the fabric threads. Keep your tension loose so the repair doesn't pucker. A darning egg or mushroom holds the fabric taut while you work.
Watch out: Pulling the thread too tight will pucker the fabric and create a weak point that tears again in the wash. Test the repair by gently stretching it before you wear the garment.
Test and wash the repair so it lasts
A mend that fails in the first wash wastes your time. Before you wear the garment, gently stretch the repaired area. If the stitches pull tight or the fabric bunches, loosen them. Turn the garment inside out and wash it on a gentle cycle with like colors. Skip the dryer for the first wash; heat can shrink thread and weaken fusible patches.
Clothing Repair Without a Sewing Machine
You can fix most garments without a machine. Hand stitches are strong when you use them correctly, and no-sew methods work for quick fixes or for people with limited dexterity or time.
Here are the main no-machine methods and when each one holds up:
- Running stitch: Good for seams and hems that do not take much stress. Use it on lightweight woven fabrics and for basting a patch in place before a stronger stitch.
- Backstitch: Strong for areas that take stress, like armholes, crotches and pocket corners. It looks like a machine stitch on the outside and holds up to repeated washing.
- Patch with fusible bonding: Iron a patch onto the back of a hole for a fast fix.
- Fabric glue: A temporary fix for hems and small tears on non-stretch fabrics. It stiffens the fabric and can yellow over time, so reserve it for repairs you plan to redo later.
- Iron-on hem tape: Quick for a fallen hem on dress pants or a skirt. It is not a permanent repair; expect to reapply it after several washes.
Watch out: Fusible bonding and fabric glue can melt or discolor synthetic fabrics like polyester and nylon. Test on an inside seam first, and use a pressing cloth between the iron and the garment.
Adaptations for limited dexterity or time
If holding a needle is difficult, try a self-threading needle or a needle threader. Magnetic needle minders keep track of needles, and a clamp or small vise can hold fabric steady while you work. For a fast fix, iron-on patches and hem tape need no stitching at all. These methods are not as durable as hand stitching, but they keep a garment in use while you plan a stronger repair.
Hand repair also works for zippers and fastenings. Sew a new button firmly, and wrap the thread around the shank so the button has room to move. For a broken zipper pull, a small split ring or a paper clip can serve as a temporary pull until you replace the slider.
Visible Mending for Beginners
Visible mending means making a repair a design feature. If your prints crack after patching or washing, see how to prevent screen print cracking on shirts before you start. Instead of hiding the patch, you highlight it with bright thread or a contrasting fabric.
This approach suits casual pieces like jeans, sweatshirts and tees. It also lets you express your style, a nice fit for a faith-inspired wardrobe with a personal touch.
Try these beginner-friendly ideas:
- Use contrasting embroidery thread for a running stitch around a hole
- Cut a patch in a fun shape, such as a star or heart
- Darn a sock with a bright color
- Add a small embroidered word or symbol over a worn spot
Pick one small project first. A single patch on a pair of jeans is a good start. Visible mending also helps you keep track of repairs as your skills grow.
Start Your First Repair This Week
Pick one garment you already own and fix one problem. A loose button or a small hole is a great first project. Gather your basic tools, follow the steps above, and give yourself time to practice.
When a garment is beyond repair, you can still pass it on. Learning how to donate clothes responsibly keeps usable pieces out of the waste stream. Our donate clothes to charity guide walks through the process step by step.
Repair also fits well with a wardrobe built to last. Our sustainable clothing options for Christian consumers explain how to shop with waste in mind, and faith and the fight against textile waste shows how many people connect stewardship to their clothing choices.
At IGIT Apparel, we design faith-inspired clothing for men, women and kids, and every purchase supports Christian ministries and youth initiatives. If you're looking for pieces built to last, shop IGIT Apparel's faith-inspired clothing and find designs that carry your faith with purpose.
Frequently Asked Questions
How do you repair clothes without a sewing machine?
You can handle most everyday repairs with a hand needle and thread. Sew loose buttons with a shank, close small tears with a whipstitch, and stitch hems with a running or slip stitch. Use a thread color that matches the garment, or choose a contrasting one if you plan visible mending. Keep stitches small and even, and reinforce stress points such as underarms and crotch seams by going over them twice. Hand repairs are slower than machine work but hold up well on knits and most woven fabrics when done carefully.
What is visible mending, and how do you get started?
Visible mending repairs a garment with contrasting thread, patches or decorative stitches so the repair becomes part of the design. Beginners should start with a simple patch on a sturdy item such as denim or a canvas tote. Cut a patch slightly larger than the hole, pin it in place on the wrong side, and sew around the edges with a running stitch or blanket stitch. Practicing on an item you already plan to discard lets you learn the stitch without pressure.
How do you patch a hole in jeans or other clothing?
Trim any loose threads around the hole, then cut a patch from matching or contrasting fabric about an inch larger on each side. Place the patch on the inside of the garment, pin it, and stitch around the edges with small running stitches. For a hole in jeans, a denim patch sewn with a sturdy thread holds up through regular washing. Fold the hem edges under before sewing if the hole is near a seam to avoid fraying.
When should you mend clothing instead of replacing it?
Mend clothing when the damage is limited to a small area, such as a loose button, a split seam or a single hole, and the rest of the garment is still in good shape. Replacement makes more sense when the fabric is thin across a large area, or when the fit no longer works and alterations would be costly. Repairing a garment you wear often usually keeps more value than buying a new one, and it reduces the textile waste that ends up in landfill.
