

Last Updated: October 23, 2026
Quick Summary
Creative ways to design youth group t-shirts start with a workflow, not a blank canvas: gather a few students, set the shirt's purpose, sketch on paper, then vote and refine. Strong designs use a small front with a bold back, hand-drawn lettering, one symbol, or two-color prints instead of a plain chest logo.
- Ask three to five students where the shirt will be worn and what one word people should feel.
- Standard screen-print placements are roughly 12 by 14 inches for a full front or back.
- Set your template canvas to real print size at 300 dots per inch before touching the text.
- Keep text and key artwork at least a half inch inside the printable area and away from seams.
- Order your headcount plus 10 to 15 percent for new students, leaders, and replacements.
Table of Contents
- Start With a Design Workflow, Not a Blank Canvas
- Youth Group T-Shirt Design Ideas That Go Beyond the Logo
- Christian Youth Group Shirt Slogans That Sound Like Students, Not Slogans
- Youth Group Shirt Design Templates: A Shortcut Worth Using
- Youth Retreat T-Shirt Ideas Built for the Trip, Not the Drawer
- Typography, Color, and Garment Choices That Decide Wearability
- Print-Ready Artwork, Budgeting, and Order Planning
- Conclusion
- Frequently Asked Questions
Start With a Design Workflow, Not a Blank Canvas
Most youth leaders open a design tool, stare at the blank canvas, and freeze when it comes to youth group t-shirts. The best creative ways to design youth group t-shirts begin with a process, not a screen.
A youth group t-shirt is a wearable sign of shared identity. Get the process right and the design follows.
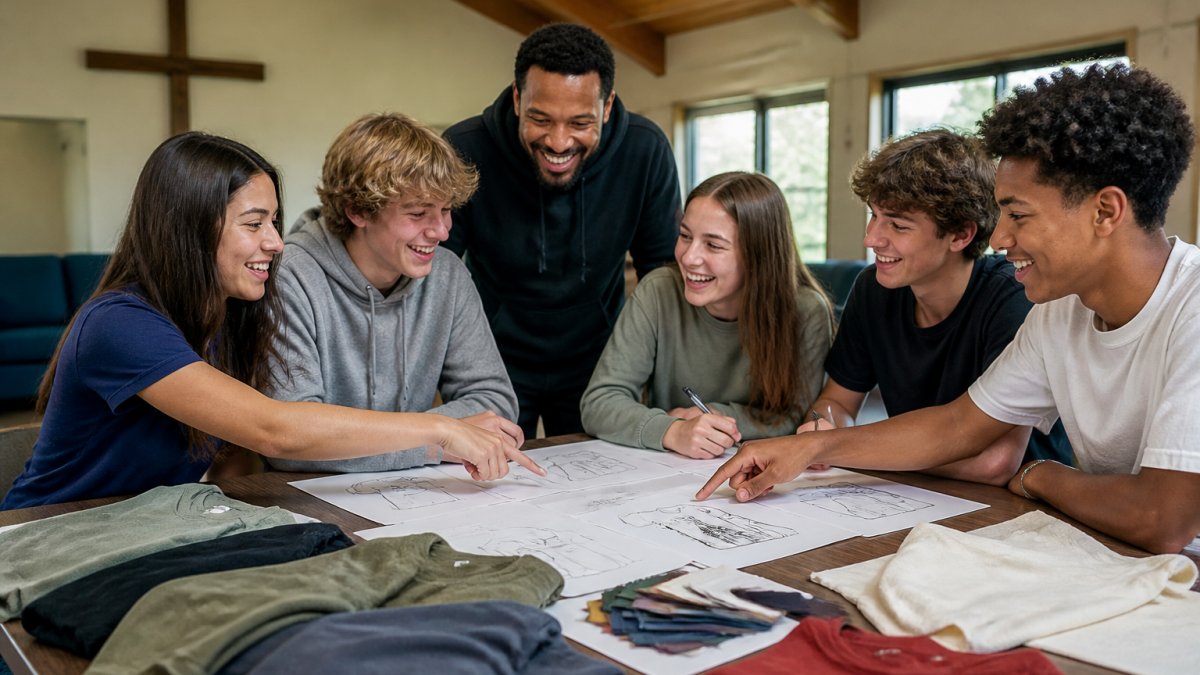
Step 1: Gather the Group and Set the Goal
Start by asking what the shirt is for, a camp shirt, retreat tee, and Sunday ministry shirt each need a different feel. Bring three to five students in and ask two questions:
- Where will we wear this?
- What one word should people feel when they see it?
Write the answers down. They become your filter for every idea later.
Step 2: Sketch, Vote, and Refine
Sketch on paper first. It's free, fast, and nobody worries about getting it perfect. Then let the group vote. Students who help choose a design actually wear it. A common mistake is letting one leader pick a favorite and hoping everyone else agrees.
If you want a head start before you sketch, see how custom merchandise promotes your ministry and why the shirt matters beyond the fabric.
Youth Group T-Shirt Design Ideas That Go Beyond the Logo
A plain logo on the chest is the safe, forgettable choice. The strongest youth group t-shirt design ideas borrow a visual idea instead of stamping a name. Try these directions:
- Small front, bold back. A tiny mark on the chest, a big statement across the shoulders.
- Hand-drawn lettering. Looks made by a student, not a software template.
- One strong symbol. A dove, a mountain, a flame, a cross made of lines.
For a deeper look at building shirts with real meaning, this guide to designing meaningful faith-based clothing walks through the creative side step by step.
Christian Youth Group Shirt Slogans That Sound Like Students, Not Slogans
The fastest way to ruin a good shirt is a slogan that preaches. Christian youth group shirt slogans work best when they're short, warm, and a little playful.
Try these patterns:
- Two words, one idea: "Rooted." "Sent." "Carried."
- A verse reference, no text: "Philippians 4:13" set small and clean.
- A question that invites: "Who's with us?"
Test every line out loud. If it sounds like a billboard, cut it. For context on why faith-based fashion lands with young people, read this look at Christian fashion's impact on youth.
Youth Group Shirt Design Templates: A Shortcut Worth Using
Templates save time without killing creativity. A good youth group shirt design template gives you a layout, font pairing, and color set, then lets you swap in your own words and symbol, a smart trade when you have a deadline and a volunteer designer.
Here's how to use templates well:
- Pick a layout that matches your print spot: full front, small chest, or full back.
- Swap the sample text for your own slogan, keep the spacing.
- Stick to the template's font pairing instead of mixing five fonts.
Templates are a starting line, not the finish. Treat them as a sketch you refine.
Match the Template to the Print Area
A template that looks great on a phone screen can fall apart on a shirt because the printable area is smaller than most people assume.
A practical habit: set your template canvas to the real print size at 300 dots per inch before you touch the text. A 12-by-14-inch front print becomes a 3,600-by-4,200-pixel canvas, so you'll never wonder whether your artwork is sharp enough to print.
Turn the Template Into Something Original
A template only becomes a youth group shirt when you replace its placeholder elements with your own. Work through these swaps in order:
- Type: keep the template's size hierarchy but change the display font to one that matches your group's personality, a bold condensed sans for a camp shirt, a rounded sans for a middle-school group, a clean serif for a more traditional ministry.
- Symbol: replace the stock icon with a hand-drawn mark from a student sketch, or simplify a photo of your retreat location into a single-color line drawing.
- Color: pull two colors from your ministry's existing materials so the shirt reads as part of the family rather than a one-off.
Know When a Template Is the Wrong Tool
Templates work best for type-led designs: a slogan, a verse reference, a year-and-location mark. They're a poor fit when your idea depends on a custom illustration, mascot, or hand-lettered piece, because forcing original art into a placeholder box flattens it.
One more caution: templates sold as "free for commercial use" sometimes bundle fonts or icons that are licensed only for personal projects.
Here are the standard screen-print placements the article gives for matching a template to the print area.
| Print spot | Printable size | Note |
|---|---|---|
| Full front or back | Roughly 12 by 14 inches | 3,600-by-4,200-pixel canvas at 300 dpi |
| Left-chest mark | 3.5 to 4 inches wide | Small mark on the chest |
| Sleeve hit | About 3 inches tall | Keep text away from seams |
Youth Retreat T-Shirt Ideas Built for the Trip, Not the Drawer
Retreat shirts should feel like a souvenir, not a uniform. The best youth retreat t-shirt ideas tie the design to the place and the moment:
- Year and location on the sleeve. Small, subtle, memorable.
- A map or trail line from the retreat spot.
- A theme verse chosen for the weekend.
Students keep shirts that remind them of a specific weekend. Skip generic "Retreat 2026" block text and tie the design to the memory.
Typography, Color, and Garment Choices That Decide Wearability
A great idea dies on a bad shirt. Wearability comes down to three choices: font, color, and fit.
Fonts and Lettering
Pick one display font and one simple body font. Keep lettering thick enough to read from across a room. Thin, fancy scripts vanish after a few washes. Sans-serif fonts print clean and stay legible.
Color Palettes and Shirt Colors
Limit your palette to two or three colors. High contrast wins: dark ink on a light shirt, or light ink on a dark shirt. Match the palette to your ministry's look so the shirt feels like part of the family.
Shirt Styles and Sizing
Offer unisex sizing and order a size up for growing students. For a soft, everyday feel, our Unisex Softstyle T-Shirt is 100% combed ringspun cotton with a tear-away label and runs true to size. For a heavier, roomier classic, the Unisex Ultra Cotton Tee runs bigger than usual, so check the size chart before ordering.

Print-Ready Artwork, Budgeting, and Order Planning
Good artwork saves money and headaches. Before sending files to a printer, make sure your design is print-ready:
- Vector or high-resolution files. Crisp lines at any size.
- Correct color mode. Print colors differ from screen colors.
- Proper margins. Keep text away from seams and edges.
Plan your order around your group size plus a few extras for new students and leaders. To keep finished shirts looking their best, learn how to prevent screen print cracking on shirts. Ask the printer about turnaround time before you promise shirts for a specific date.
Prepare the File the Way Printers Actually Want It
- Format: vector formats such as AI, EPS, PDF, or SVG for logos and lettering; a flattened PNG or TIFF at 300 dots per inch for raster artwork. Never send a screenshot or a file pulled from a social post.
- Resolution: 300 dots per inch at final print size is the working standard. A file that looks crisp on a monitor can still be too low-resolution once it is enlarged to a 12-inch chest print.
- Color mode: design in CMYK for print, not RGB. Screen colors are brighter and will shift when converted, so pick your shirt and ink colors from a physical swatch or a Pantone-style color guide rather than eyeballing them on a monitor.
Build a Simple Budget Before You Shop
- Quantity: per-unit cost drops as the order grows, because setup charges are spread across more shirts. Ordering 12 versus 48 changes the math significantly.
- Garment quality: a basic cotton tee, a ringspun softstyle tee, and a performance or hooded option sit at different price points. Match the garment to how often the shirt will be worn.
- Print locations: a one-location front print is the least expensive; adding a back print, a sleeve hit, or a name personalization adds cost per shirt.
- Confirm the headcount, then add 10 to 15 percent for new students, leaders, and replacements.
- Decide the garment and color first, since those set the base cost.
- Choose one or two print locations and stick to them.
- Collect sizes before ordering, a size run that skews wrong means reordering at a higher per-unit price.
- Ask about turnaround time and any rush fees, then work backward from the date you need shirts in hand.
- Request a written quote that itemizes garments, printing, setup, and shipping so you can compare options fairly.
Conclusion
Designing shirts for a youth group is a creative project with a real payoff: students who wear their faith with confidence. Start with a workflow, invite students into the decision, and choose garments that hold up to real life. When you're ready to order, IGIT Apparel makes faith-inspired clothing for men, women, and kids, and every purchase helps fund Christian ministries that support youth and teenagers.
Frequently Asked Questions
How do you design a youth group t-shirt that teens will actually wear?
Start with the students, not the artwork. Ask a small group of teens to name the styles they already wear, then build the design around one clear idea rather than five. Keep the front print small and readable, limit the design to two or three ink colors, and test the layout on a plain shirt before ordering. A simple design with strong lettering usually gets worn far more often than a busy one with multiple graphics.
What should you put on a youth group shirt?
Pick one element to lead: a short slogan, a scripture reference, a camp or retreat name, or a simple logo mark. Christian youth group shirt slogans work best when they sound like something a student would say out loud, not a formal statement. Pair the text with one supporting graphic, such as a hand-drawn illustration or a simple icon, and leave enough empty space so the message reads clearly from a few feet away.
What colors work best for youth group t-shirts?
Choose a shirt color your students already wear, then pick ink colors that contrast sharply with it. Dark text on a light shirt and light text on a dark shirt both read well; mid-tone text on a mid-tone shirt does not. Heather grey, black, navy, and white are safe bases because they match most wardrobes. If you want a brighter palette, keep the shirt neutral and let the print carry the color.
What should you consider before ordering youth group shirts?
Confirm three things first: the size breakdown, and the budget per shirt. Collect sizes from every student rather than guessing, since a shirt that does not fit will not get worn. Planning the order this way avoids leftover boxes of unusable sizes.
Ready to put your group's idea on a shirt? Shop now and turn a good design into something students actually wear.
